Making Hills
Posted: Wed Aug 01, 2018 5:25 pm
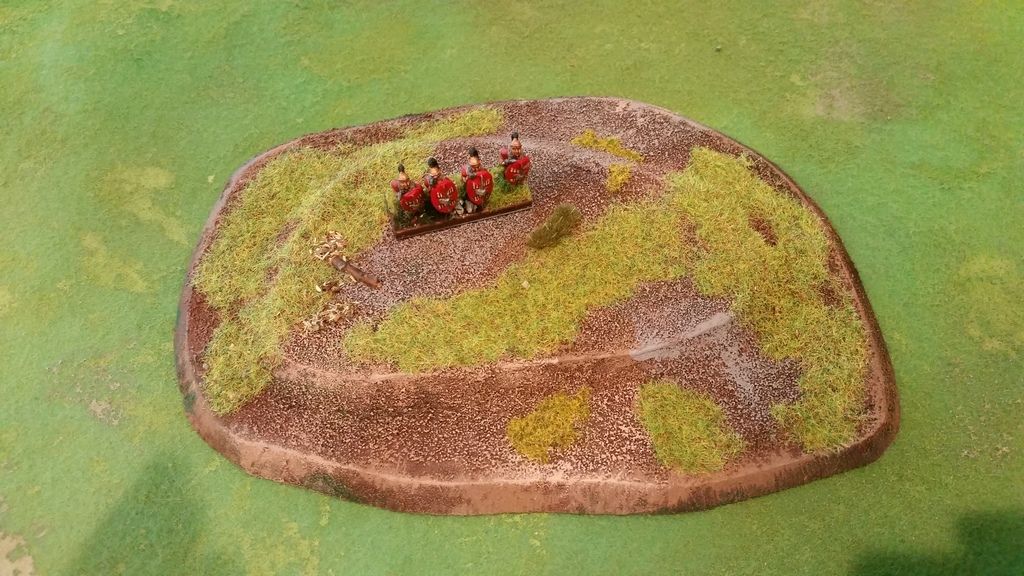
This hill is part of a set of six I made for Triumph. A stand of Romans is on top to show the scale.

Here is the basic process used:
1. Buy MDF board at your local home improvement store and foamcore at the hobby shop.
2. Use a jig saw to cut out the hill shape, angling the blade to give it at least a 45 degree slope. The MDF hill will have a nice weight and won't slide around on the board.
3. Cut a smaller hill shape out of foamcore using an X-Acto knife. I used foamcore for the second level because I didn't feel confident cutting such a small shape with a jigsaw. Glue it to the MDF hill.
4. Sand the edges and slopes of both levels to smooth them out.
5. Use white/Elmer's glue and sand to add texture over most of the hill.
6. Base coat dark brown with craft store acrylic paints.
7. Drybrush light brown
8. Light drybrush gray and/or sand color
9. Add static grass and other details (fallen log, etc.) in patches
10. Spray with matte sealer
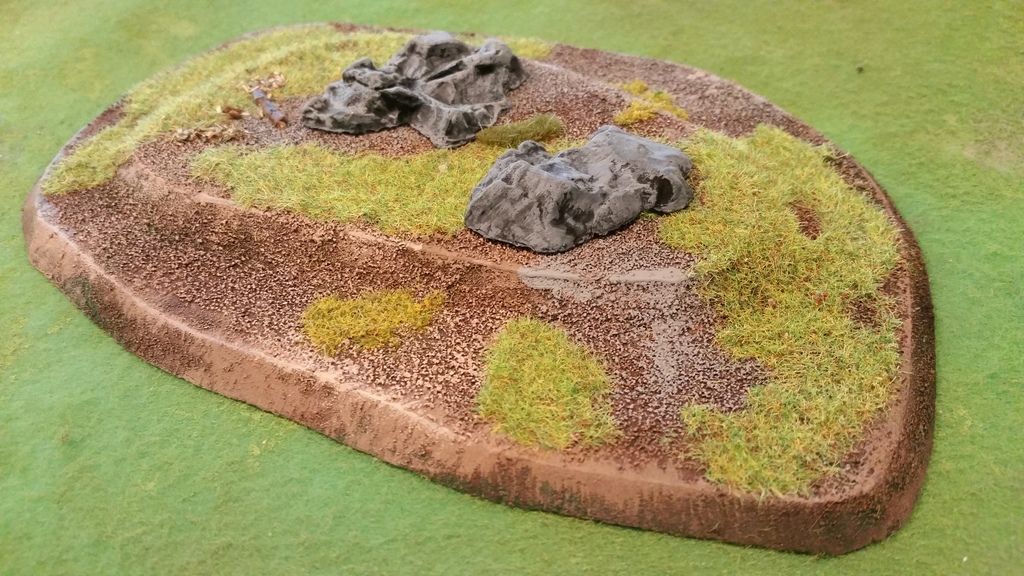
I can add rock formations to the top to designate a steep hill. These were from the model railroad section of Hobby Lobby and with a 40% off coupon cost about $3 for a pack of four.

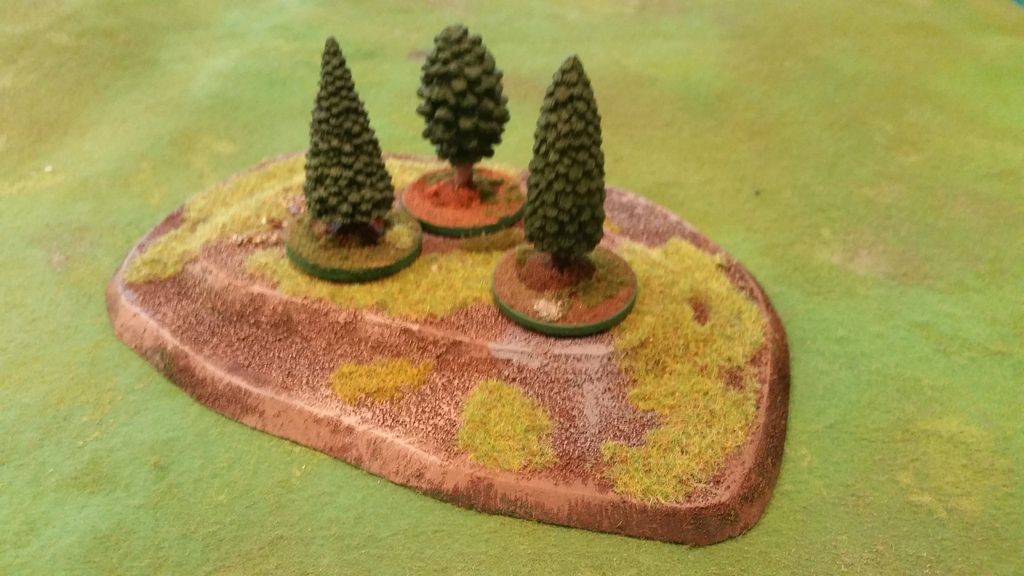
And now it is a wooded hill.

I use trees from one of those Safari tubes you can get at Hobby Lobby. They are relatively cheap, a good size for the table, don't drop flocking everywhere, and can be tossed into a box without getting damaged. Just glue them to wooden disks, drybrush and/or stain to make them look decent, texture and paint the base, and you are good to go.

Here is the basic process used:
1. Buy MDF board at your local home improvement store and foamcore at the hobby shop.
2. Use a jig saw to cut out the hill shape, angling the blade to give it at least a 45 degree slope. The MDF hill will have a nice weight and won't slide around on the board.
3. Cut a smaller hill shape out of foamcore using an X-Acto knife. I used foamcore for the second level because I didn't feel confident cutting such a small shape with a jigsaw. Glue it to the MDF hill.
4. Sand the edges and slopes of both levels to smooth them out.
5. Use white/Elmer's glue and sand to add texture over most of the hill.
6. Base coat dark brown with craft store acrylic paints.
7. Drybrush light brown
8. Light drybrush gray and/or sand color
9. Add static grass and other details (fallen log, etc.) in patches
10. Spray with matte sealer
I can add rock formations to the top to designate a steep hill. These were from the model railroad section of Hobby Lobby and with a 40% off coupon cost about $3 for a pack of four.

And now it is a wooded hill.

I use trees from one of those Safari tubes you can get at Hobby Lobby. They are relatively cheap, a good size for the table, don't drop flocking everywhere, and can be tossed into a box without getting damaged. Just glue them to wooden disks, drybrush and/or stain to make them look decent, texture and paint the base, and you are good to go.